Bounty Bar Slice
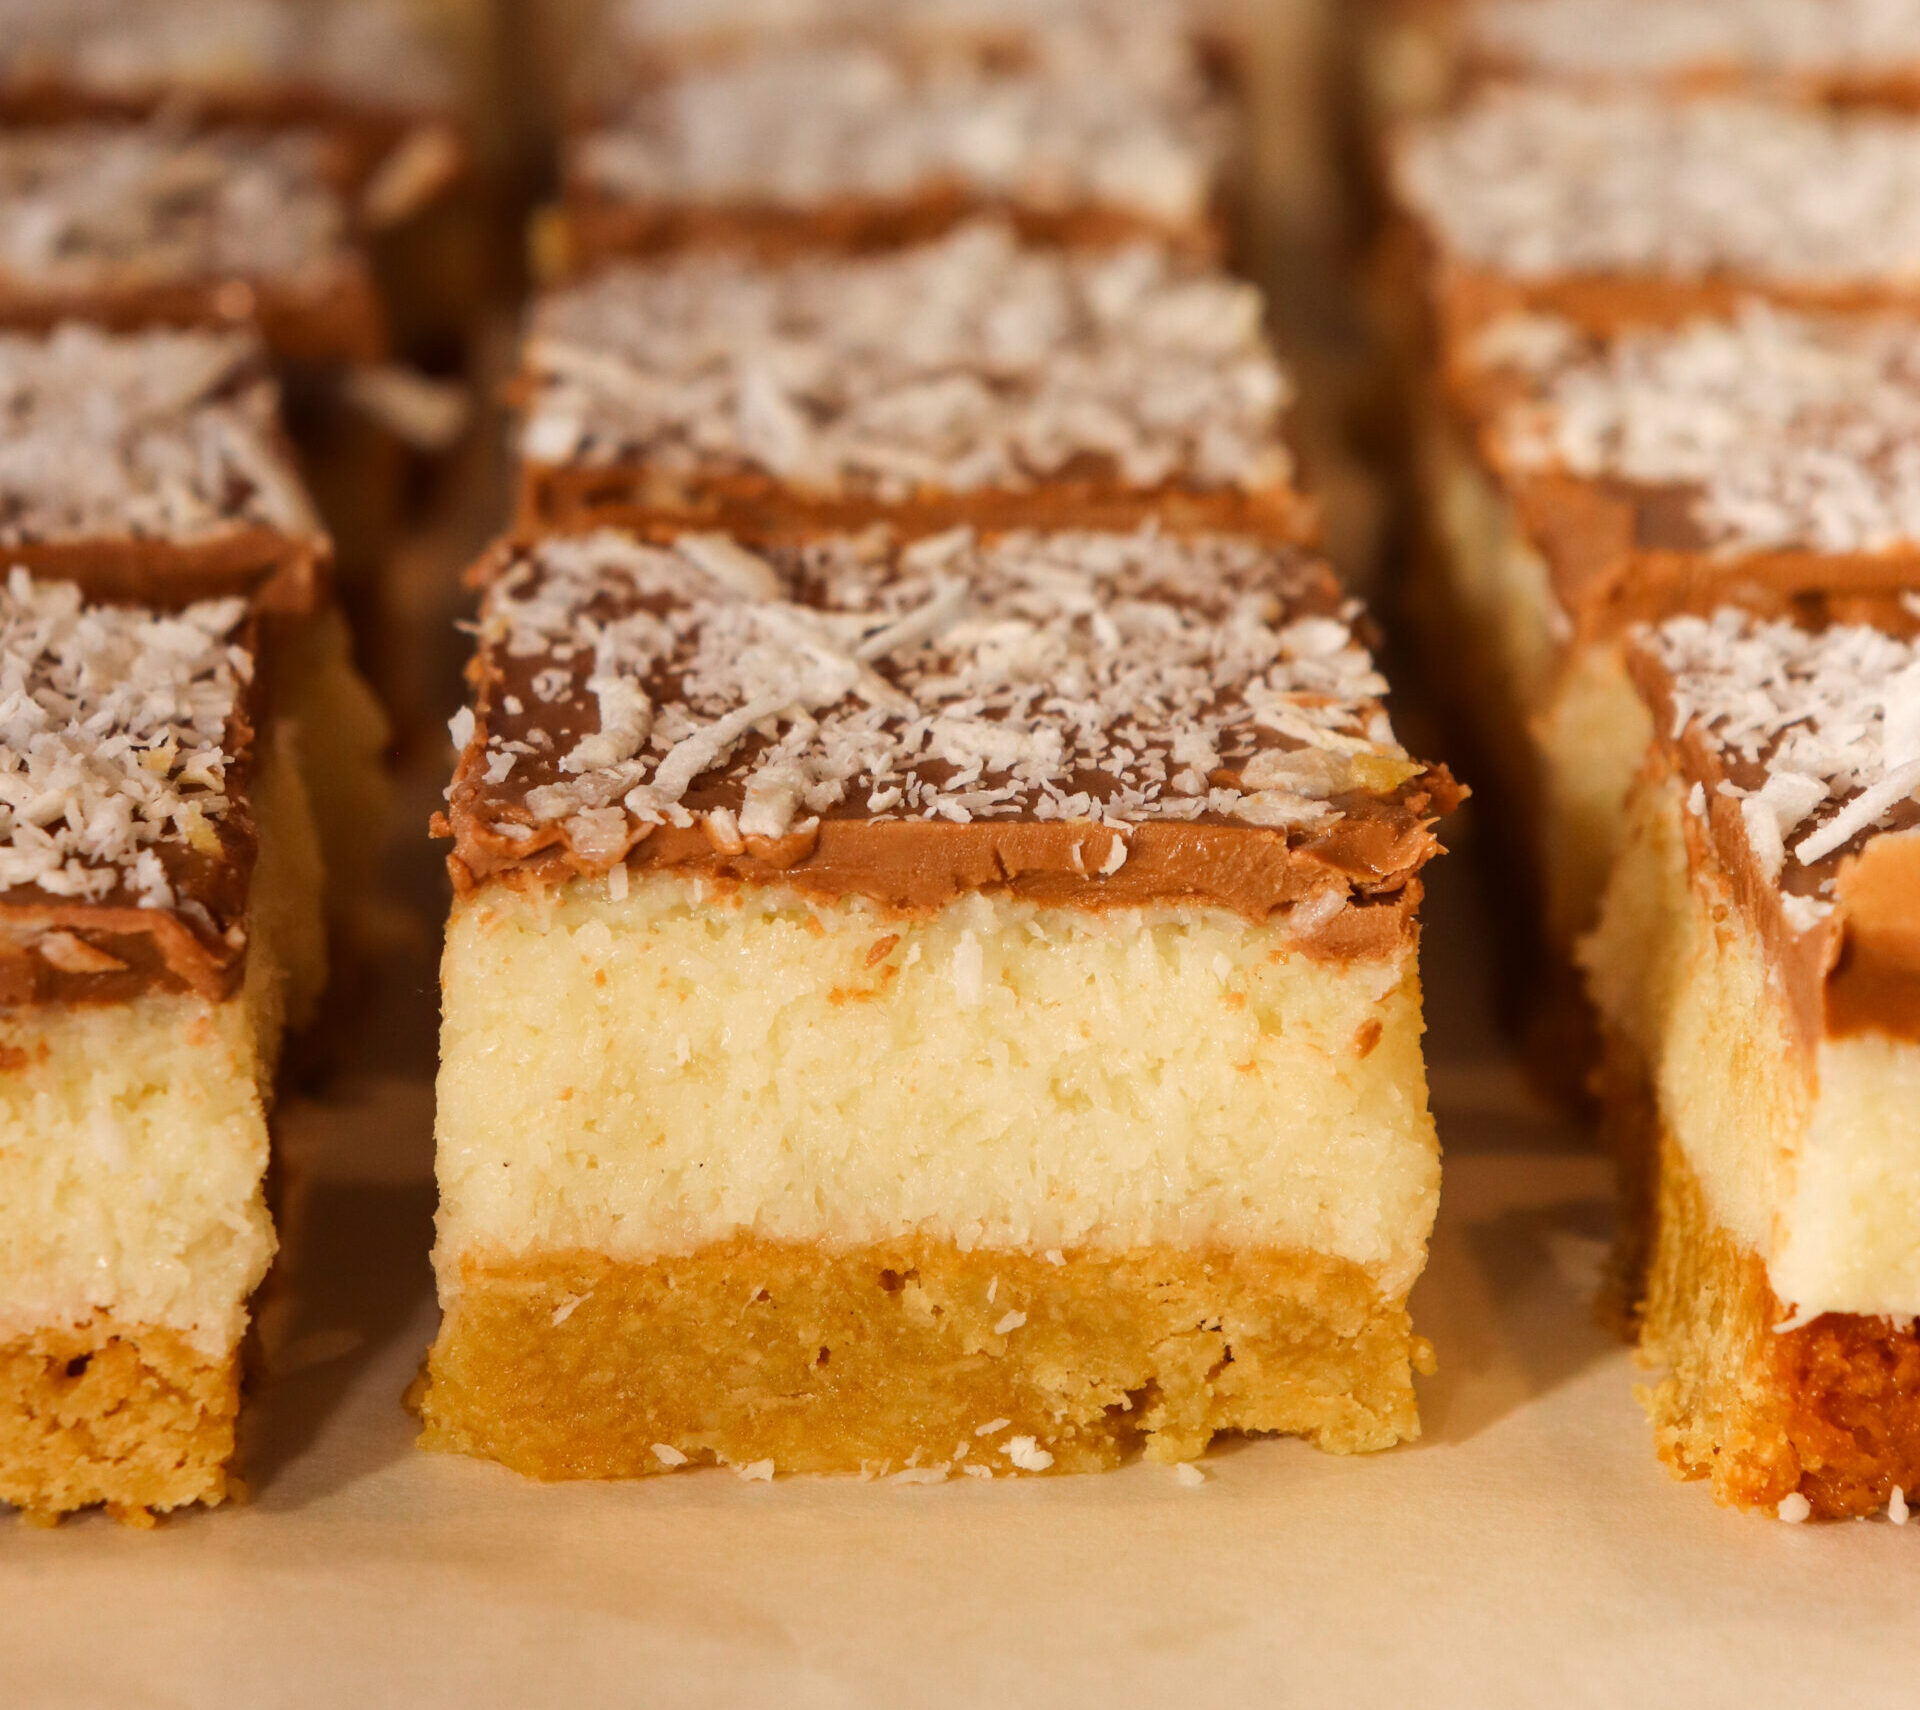
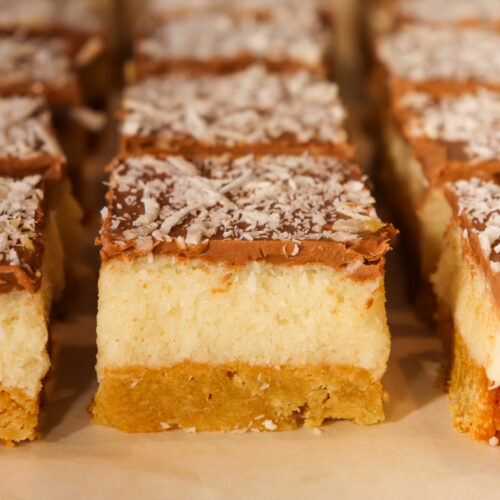
If you love a Bounty chocolate bar, you’re going to love this homemade Bounty Bar Slice! It’s got a buttery, chewy caramelised coconut base, a thick coconut filling made with condensed milk, and a generous layer of smooth milk chocolate on top.
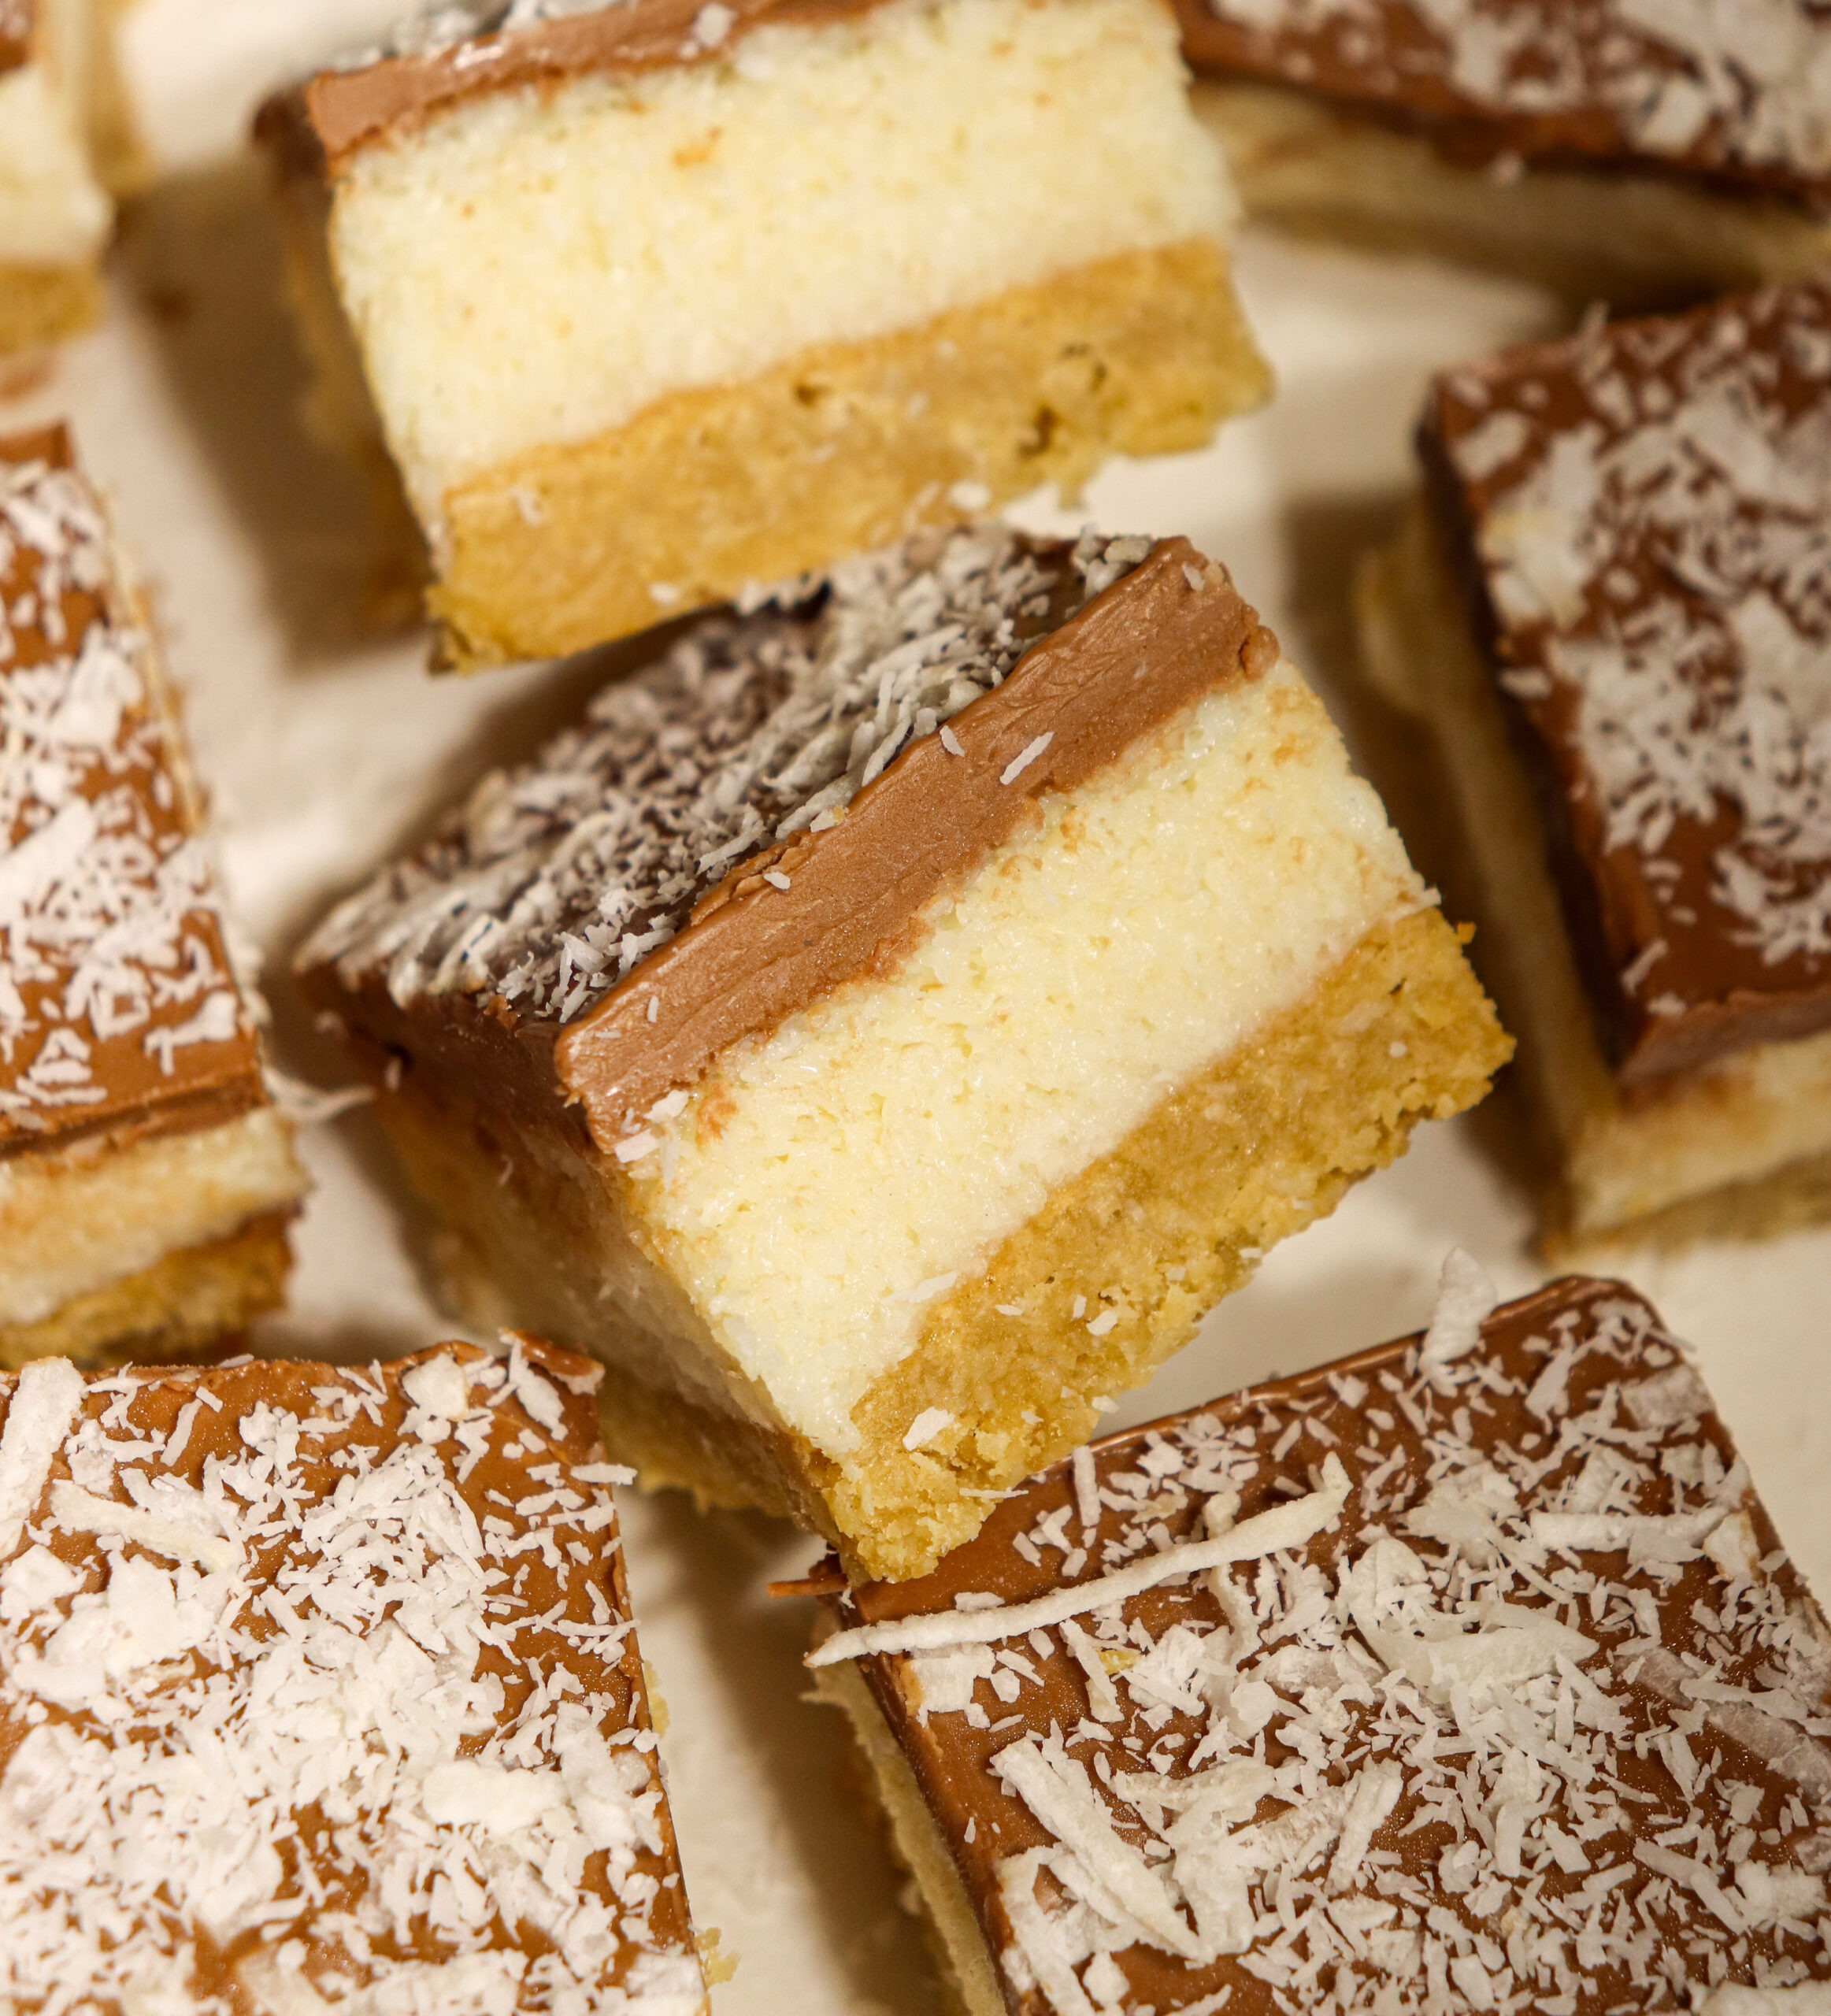
It’s one of those slices that’s pretty hard to stop at just one piece. The golden base gives it a lovely caramel flavour, the coconut filling is sweet and chewy, and the chocolate on top brings everything together.
And the best part? It’s really easy to make! There’s only a little bit of baking involved, and the rest is just mixing, layering and letting the fridge do its thing.
Perfect for afternoon tea, taking along to a get-together, or keeping a container in the fridge for when you feel like something sweet.
Why You’ll Love This Bounty Bar Slice
- Chewy caramelised coconut base: Unlike your usual biscuit base, this one is baked until lightly golden, giving it a lovely buttery, caramel flavour.
- Packed with coconut: If you’re a coconut lover, this one’s definitely for you! There’s coconut in both the base and the filling.
- Only 10–12 minutes of baking: Once the base is cooked, there’s no more oven time needed.
- Simple ingredients: Nothing fancy required, just a few everyday baking staples.
- Perfect for making ahead: This slice keeps well in the fridge, making it great for lunchboxes, afternoon tea or having something sweet ready to go.
What Makes This Bounty Bar Slice Different?
Most homemade Bounty Bar Slice recipes use a crushed biscuit base or skip the baking altogether. But I wanted something a little different.
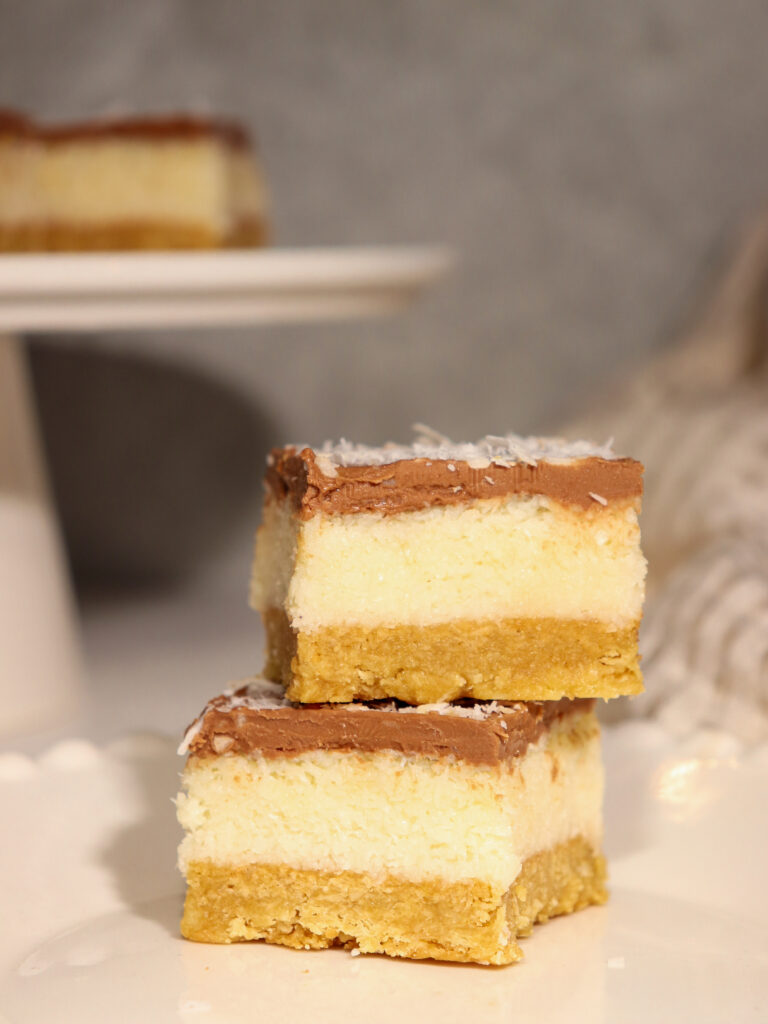
Instead of using biscuits, I’ve made a buttery coconut base with brown sugar and golden syrup. It gets baked until lightly golden, giving it a delicious caramelised flavour and a slightly chewy texture.
Then there’s the thick coconut filling made with condensed milk, which gives you that classic sweet, chewy Bounty centre.
Finish it off with a layer of milk chocolate and a sprinkle of coconut, and you’ve got three delicious layers that work so well together.
Ingredients You’ll Need
You only need a handful of ingredients to make this Bounty Bar Slice.
For the Caramelised Coconut Base
- Butter: Gives the base its rich, buttery flavour and helps everything hold together.
- Brown sugar: Adds sweetness and a lovely caramel flavour.
- Golden syrup: Helps give the base its slightly chewy texture.
- Desiccated coconut: Adds coconut flavour and texture.
- Plain flour: Helps bind the base together.
- Salt: Just a pinch to balance out the sweetness.
For the Coconut Filling
- Sweetened condensed milk: Holds the coconut together and creates that sweet, chewy filling.
- Desiccated coconut: The main ingredient for that classic Bounty-style centre.
- Vanilla essence: Adds a little extra flavour.
- Salt: Helps balance the sweetness.
For the Chocolate Topping
- Milk chocolate: I like using a good-quality milk chocolate, such as Whittaker’s Creamy Milk or Cadbury Milk Chocolate.
- Coconut oil or neutral oil: Helps make the chocolate easier to spread and a little softer to slice.
You can also sprinkle a little extra coconut over the chocolate before it sets if you like.
How to Make Bounty Bar Slice
This slice is made in three simple layers. You’ll bake the base first, add the coconut filling, then finish it off with melted chocolate.
Step 1: Make the Caramelised Coconut Base
Preheat your oven to 170°C conventional (160°C fan bake) and line a 20 cm square baking tin with baking paper.
In a small saucepan, melt the butter, brown sugar and golden syrup together over a low heat, stirring until smooth.
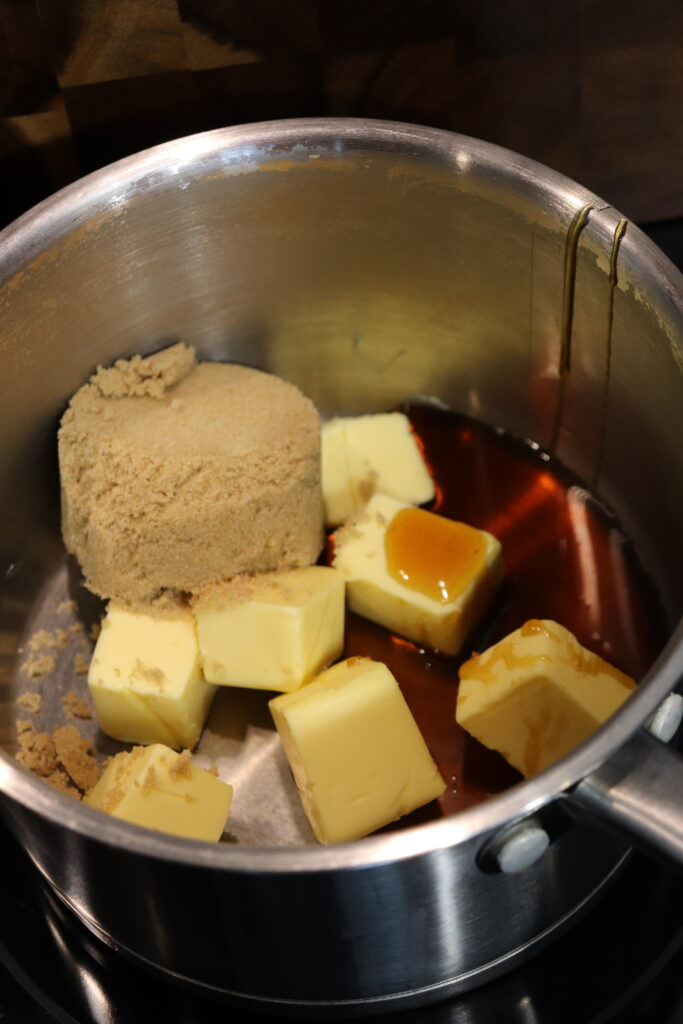
Remove from the heat and stir through the desiccated coconut, plain flour and a pinch of salt.
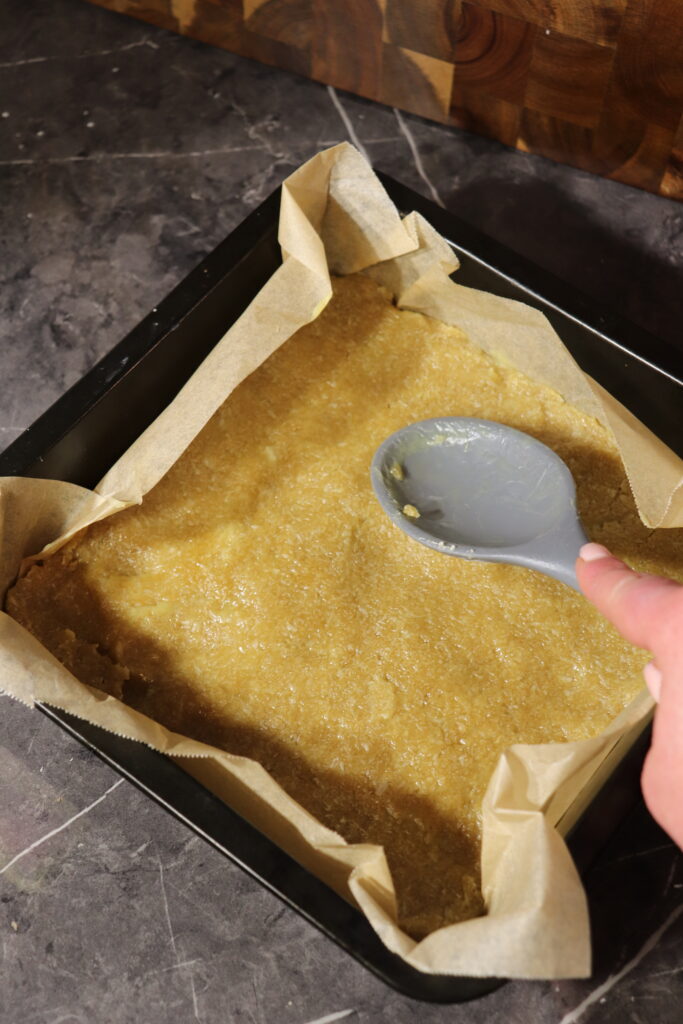
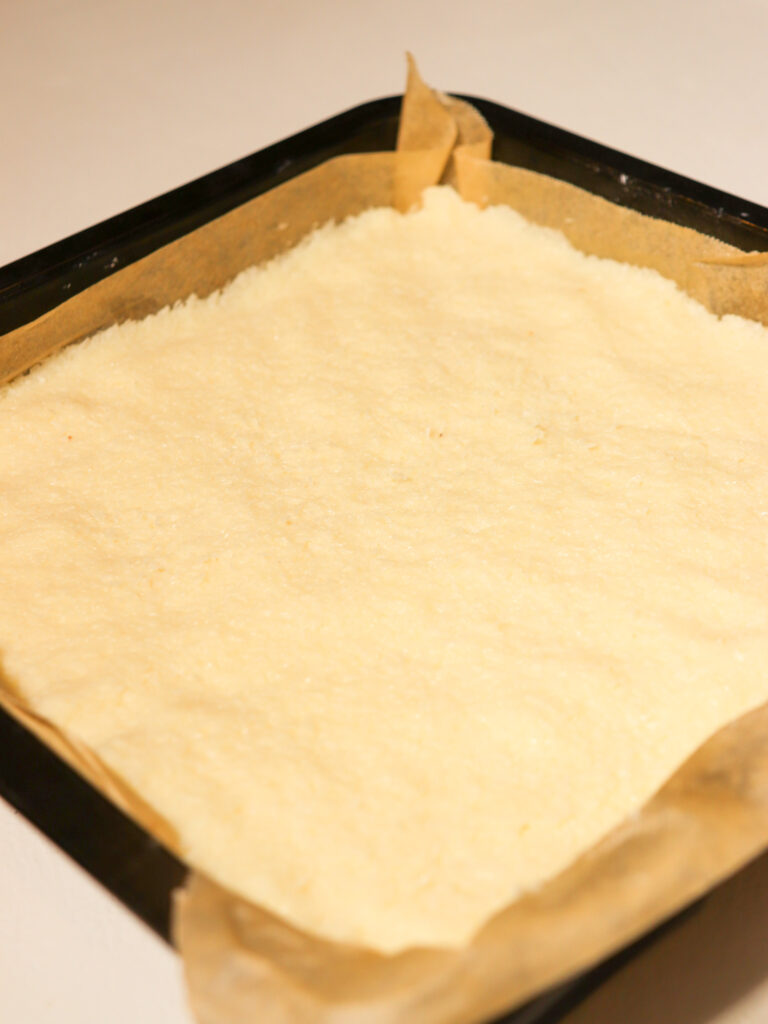
Press the mixture firmly and evenly into your prepared tin. I find the back of a spoon works well for getting it nice and compact.
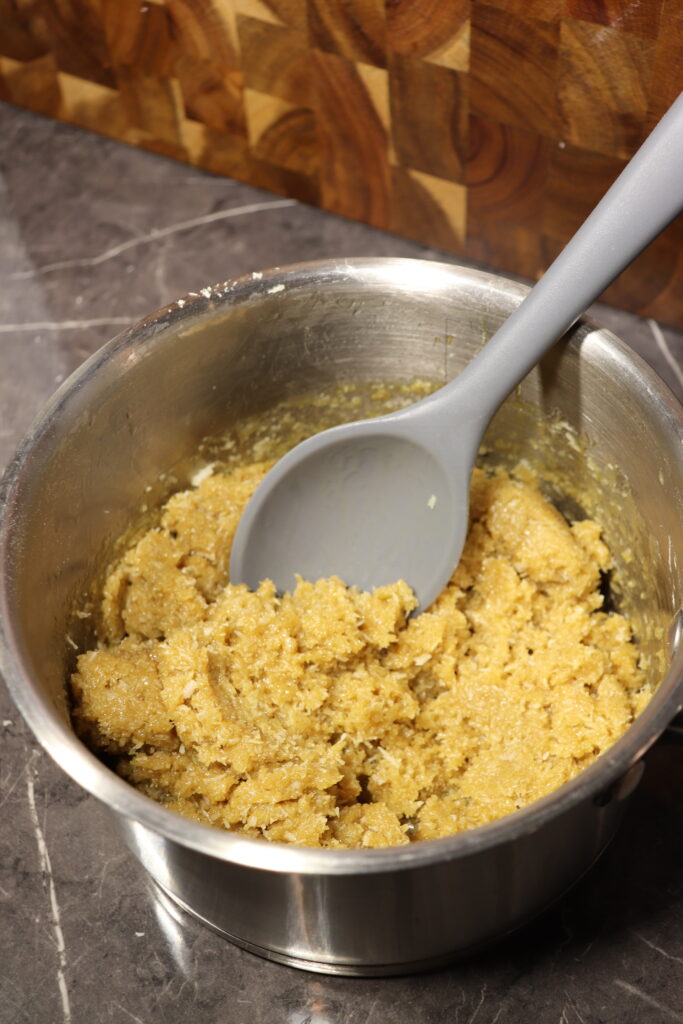
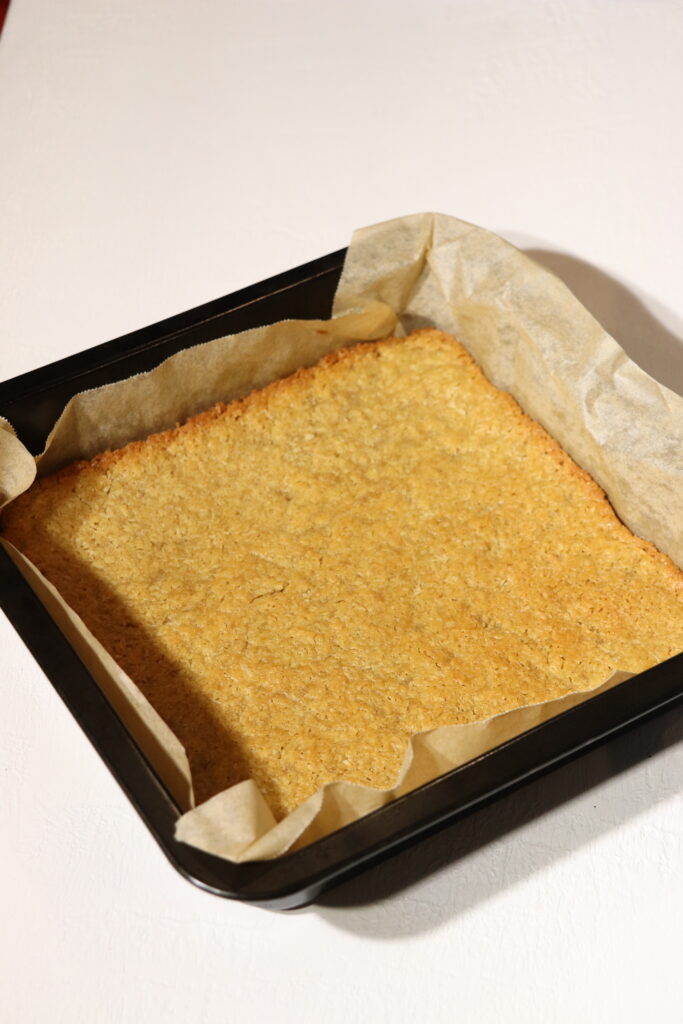
Bake for 10–12 minutes, or until the base is lightly golden.
Leave it to cool completely before adding the coconut filling.
Step 2: Make the Coconut Filling
In a large mixing bowl, combine the sweetened condensed milk, desiccated coconut, vanilla essence and salt.
Mix until everything is well combined. The mixture will be quite thick and sticky, which is exactly what you want.
Spoon it over the cooled base and spread it out evenly, pressing it down firmly with the back of a spoon or spatula.
Pop the tin into the fridge for around 30 minutes, or until the coconut layer feels slightly firm to the touch.
Step 3: Add the Chocolate Topping
Break the milk chocolate into pieces and place it in a microwave-safe bowl with the coconut oil.
Microwave in short bursts, stirring between each one, until the chocolate is completely melted and smooth.
Alternatively, you can melt it gently over a saucepan of simmering water.
Pour the melted chocolate over the chilled coconut filling and spread it evenly across the top.
Give the tin a gentle tap on the bench to help smooth out the chocolate, then sprinkle over a little extra coconut if you like.
Step 4: Chill and Slice
Place the slice back into the fridge for 1–2 hours, or until the chocolate and coconut layers have completely set.
Once firm, lift it out of the tin using the baking paper.
For nice clean slices, use a sharp knife warmed under hot water, wiping it dry between cuts.
Cut into 16 squares and enjoy!

My Tips for the Best Bounty Bar Slice
Don’t overbake the base. You only want it lightly golden. Baking it for too long can make it harder and take away some of that lovely chewy texture.
Let the base cool completely. If it’s still warm when you add the coconut filling, the layers can become a bit messy.
Press the coconut filling down firmly. This helps everything hold together when you come to slice it.
Use a good-quality chocolate. Because chocolate is such a big part of this recipe, using one you really like makes a difference.
Don’t rush the chilling time. Giving the slice enough time to set makes it much easier to cut into neat squares.
Warm your knife before cutting. This helps prevent the chocolate topping from cracking and gives you much cleaner edges.
Can You Make Bounty Bar Slice Ahead of Time?
Absolutely! In fact, I think this is one of those slices that’s even better once it’s had plenty of time in the fridge.
You can easily make it the day before you need it and leave it to set overnight.
Just keep it covered in the fridge until you’re ready to cut and serve.
How to Store Bounty Bar Slice
In the fridge: Store your Bounty Bar Slice in an airtight container in the fridge for up to 7 days.
In the freezer: You can also freeze it for up to 2 months. Place the squares in an airtight container with baking paper between the layers to stop them sticking together.
To serve: I like letting the slice sit at room temperature for around 10 minutes before eating. It softens slightly and gives you that lovely chewy texture.
Bounty Bar Slice
Ingredients
Caramelised Coconut Base
- 100 g butter
- 75 g brown sugar
- 1 tbsp golden syrup
- 120 g desiccated coconut
- 65 g plain flour
- Pinch of salt
Coconut Filling
- 395 g sweetened condensed milk 1 can
- 255 g desiccated coconut
- 1 tsp vanilla essence
- Pinch of salt
Chocolate Topping
- 180 g milk chocolate
- 20 g coconut oil or neutral oil
- Extra desiccated coconut for sprinkling (optional)
Instructions
Make the Caramelised Coconut Base
- Preheat the oven to 170°C conventional (160°C fan bake) and line a 20 cm square baking tin with baking paper.
- In a small saucepan, melt the butter, brown sugar and golden syrup together over low heat, stirring until smooth.
- Remove from the heat and stir in the desiccated coconut, plain flour and salt until well combined.
- Press the mixture firmly and evenly into the prepared tin. Bake for 10–12 minutes, or until lightly golden. Allow to cool completely.
Prepare the Coconut Filling
- In a large bowl, combine the sweetened condensed milk, desiccated coconut, vanilla essence and salt. Mix until thick and sticky.
- Spread the coconut mixture evenly over the cooled base, pressing down firmly with the back of a spoon.
- Refrigerate for 30 minutes, or until the surface feels slightly firm to the touch.
Add the Chocolate Topping
- Place the milk chocolate and coconut oil in a microwave-safe bowl. Microwave in short bursts, stirring between each, until melted and smooth.
- Pour the melted chocolate over the chilled coconut layer and spread evenly. Gently tap the tin on the bench to smooth the surface.
- Sprinkle with extra desiccated coconut if desired.
Chill and Slice
- Refrigerate for 1–2 hours, or until completely set.
- Remove from the tin and cut into 16 squares using a sharp knife warmed under hot water, wiping it dry between cuts.
Notes
-
Don’t overbake the base: Bake until just lightly golden to keep that lovely chewy texture.
-
Use good-quality chocolate: Whittaker’s Creamy Milk works beautifully for that classic Bounty flavour.
-
For clean slices: Let the slice sit at room temperature for 5–10 minutes before cutting, and use a warm, sharp knife.
-
Storage: Store in an airtight container in the fridge for up to 7 days.
-
Freezing: Freeze for up to 2 months, with baking paper between layers.
If you give this Bounty Bar Slice a go, I’d love to hear what you think! Leave a comment and rating below, or tag me on social media @sara_elcock so I can see your creations!
Frequently Asked Questions
Can I use dark chocolate instead of milk chocolate?
Definitely! If you find milk chocolate a little too sweet, dark chocolate is a great alternative. It gives the slice a richer chocolate flavour and balances out the sweet coconut filling.
Can I make this Bounty Bar Slice without baking?
The coconut filling and chocolate topping don’t need baking, but the caramelised coconut base does. Baking is what gives it that lovely golden colour and chewy texture.
Why is my coconut filling so thick?
That’s completely normal! The desiccated coconut absorbs the condensed milk, creating a thick, sticky mixture. Just make sure everything is mixed together well before pressing it into the tin.
How do I stop the chocolate from cracking when slicing?
Adding a little coconut oil to the melted chocolate helps keep it slightly softer. Letting the slice sit out of the fridge for 5–10 minutes and using a warm, sharp knife also makes cutting much easier.
Can I use shredded coconut instead of desiccated coconut?
You can, but I recommend sticking with desiccated coconut for the filling. Its finer texture helps everything bind together and gives you that classic chewy Bounty-style centre.
A Little Something for the Coconut Lovers
If you’re anything like me and love a good homemade slice, this Bounty Bar Slice is definitely one to add to your baking list.
Between the chewy caramelised coconut base, thick coconut filling and smooth milk chocolate topping, it’s got a little bit of everything.
It’s simple to make, keeps well in the fridge and is perfect for when you feel like something sweet.
If you loved this Bounty Bar Slice, be sure to check out my other sweet treats and slice recipes for more delicious homemade baking ideas!